This guide offers instruction on how to capture, edit and upload gameplay images to be used here on the Mafia Wiki.
Capturing Images of Gameplay
Images should always be taken directly from gameplay. Those taken from video should only be used prior to the game's release and should be added to the Images-Needing Replacement category so they can be replaced with better quality images once the game is released. With few exceptions images should be 1920 X 1080 in size prior to uploading.
Removing the Player Character
The player character should not be included in images unless it's the subject of it. This can be difficult because the Mafia Series games are third person and don't have an option for first person view. You can get around this by using the instructions below.
Getting Set Up
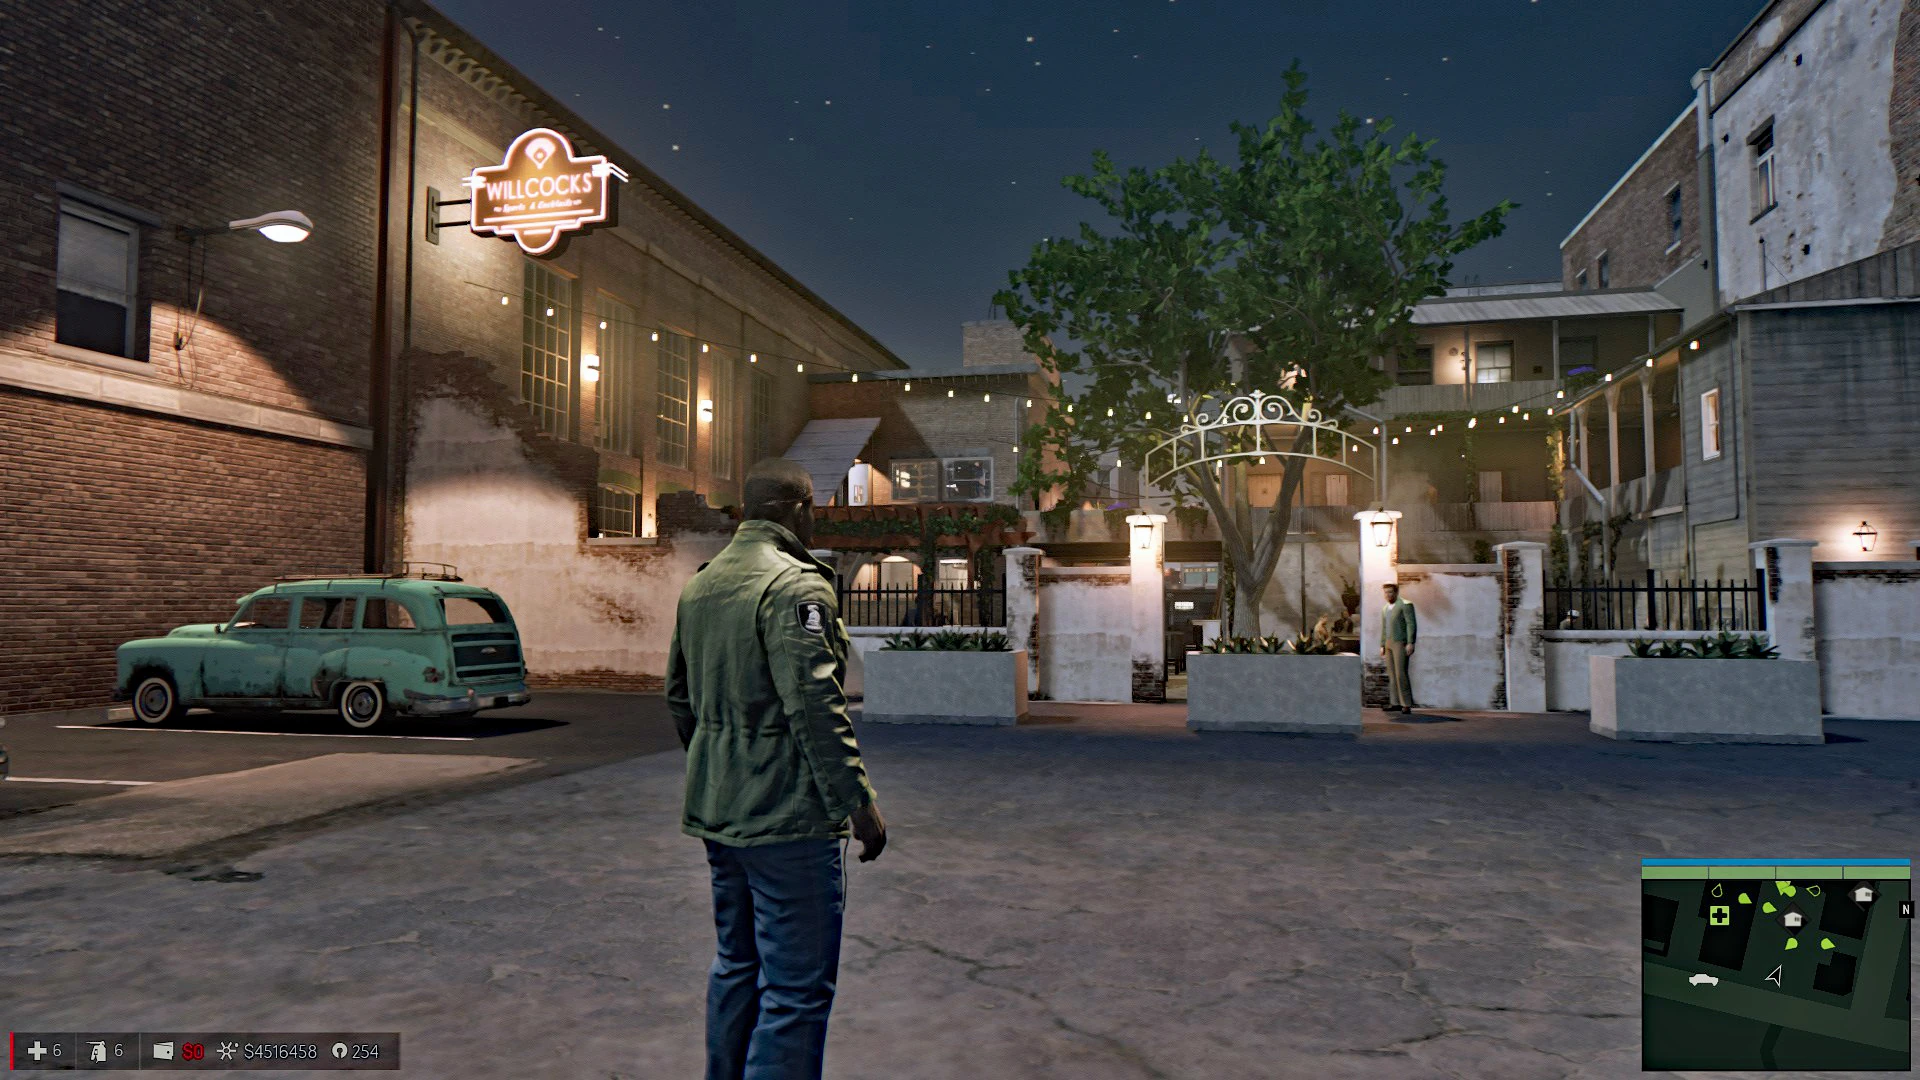
Area to be captured
The first thing to do is to make sure you don't have any waypoints, current objectives, equipped weapons, messages, or other HUD items displayed on your screen. Some items like the mini-map cannot be removed and will need to be cropped out later. Once you're ready, find a good vantage point to take the image.
Takeing Cover
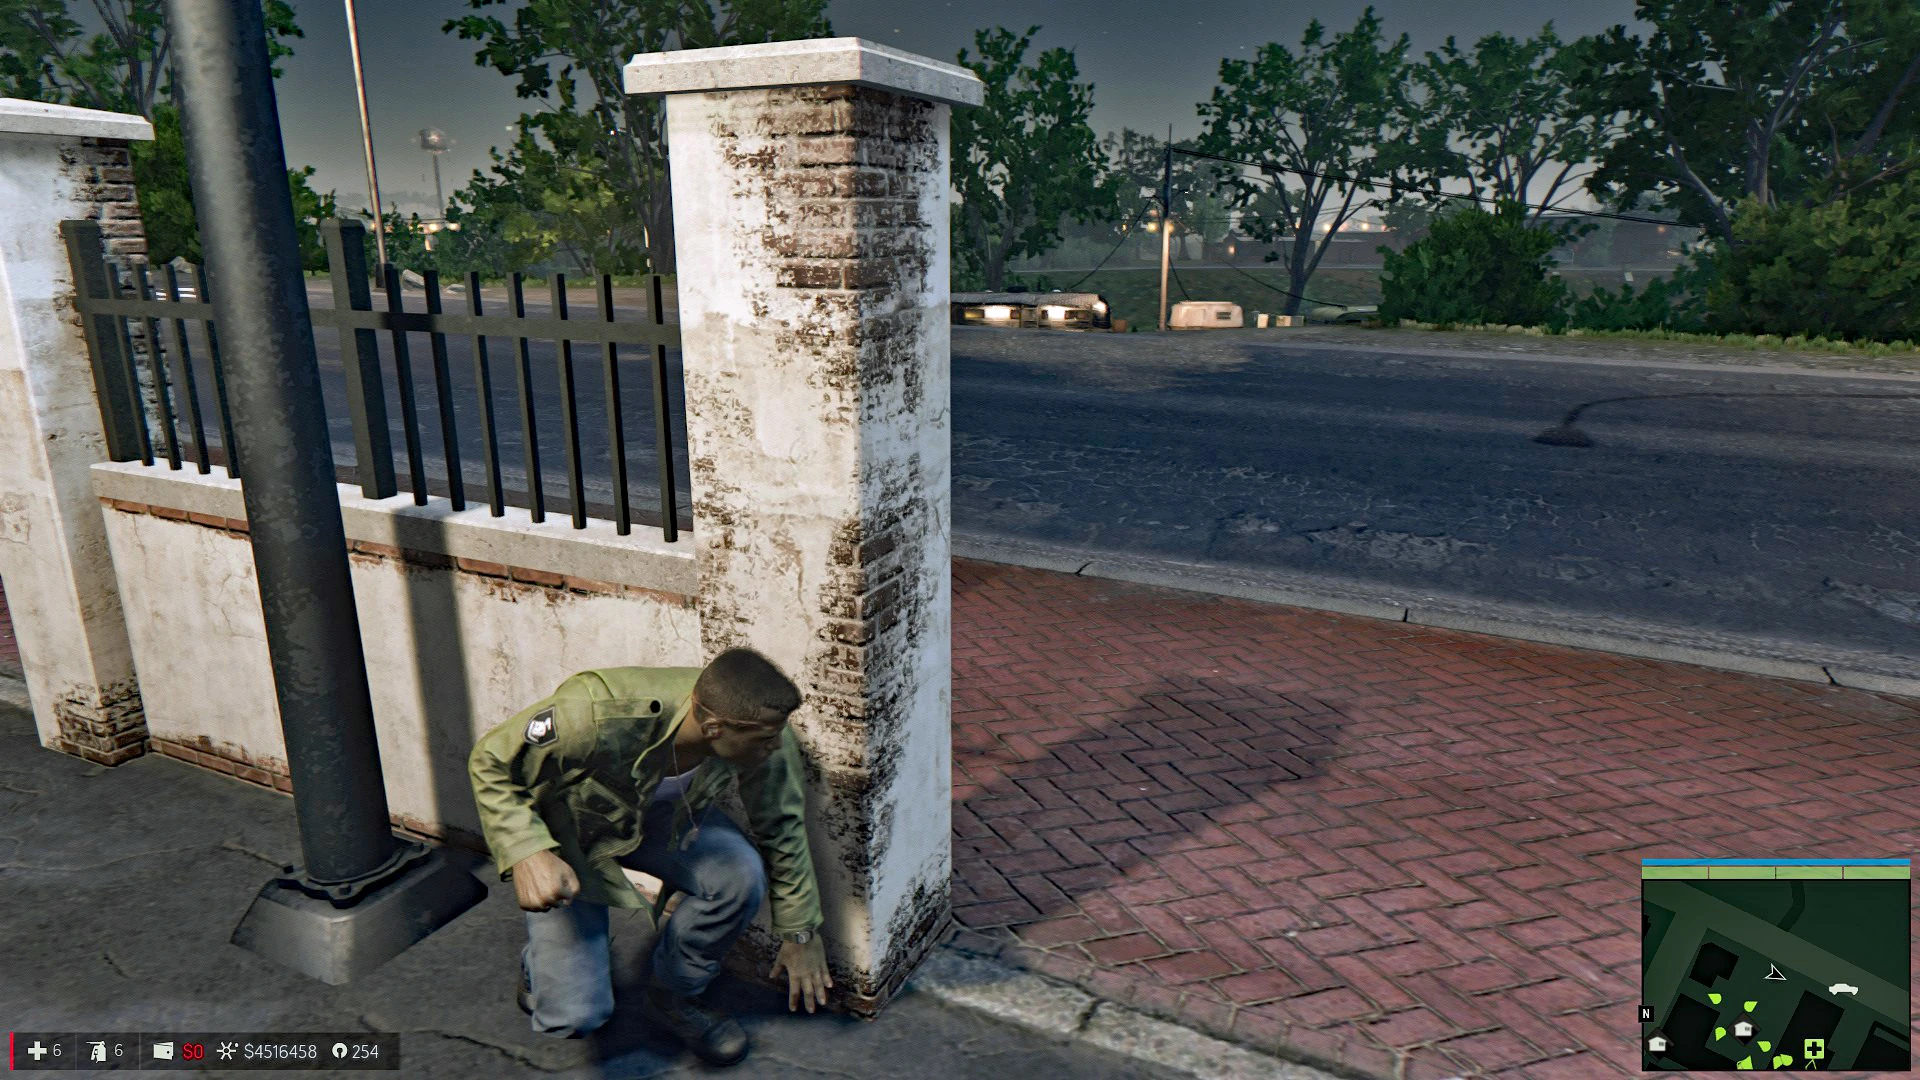
Taking cover
The best way to get an image is to use the cover system. Once you decide on the best view and angle of the subject, find some nearby cover. If none is available, you can use a vehicle, taller vehicles work best. In addition to taking cover, you can also crouch down and face a wall or large vehicle. This method also works against items that don't allow cover to be taken, such as trees or lamp posts.
Framing The Image
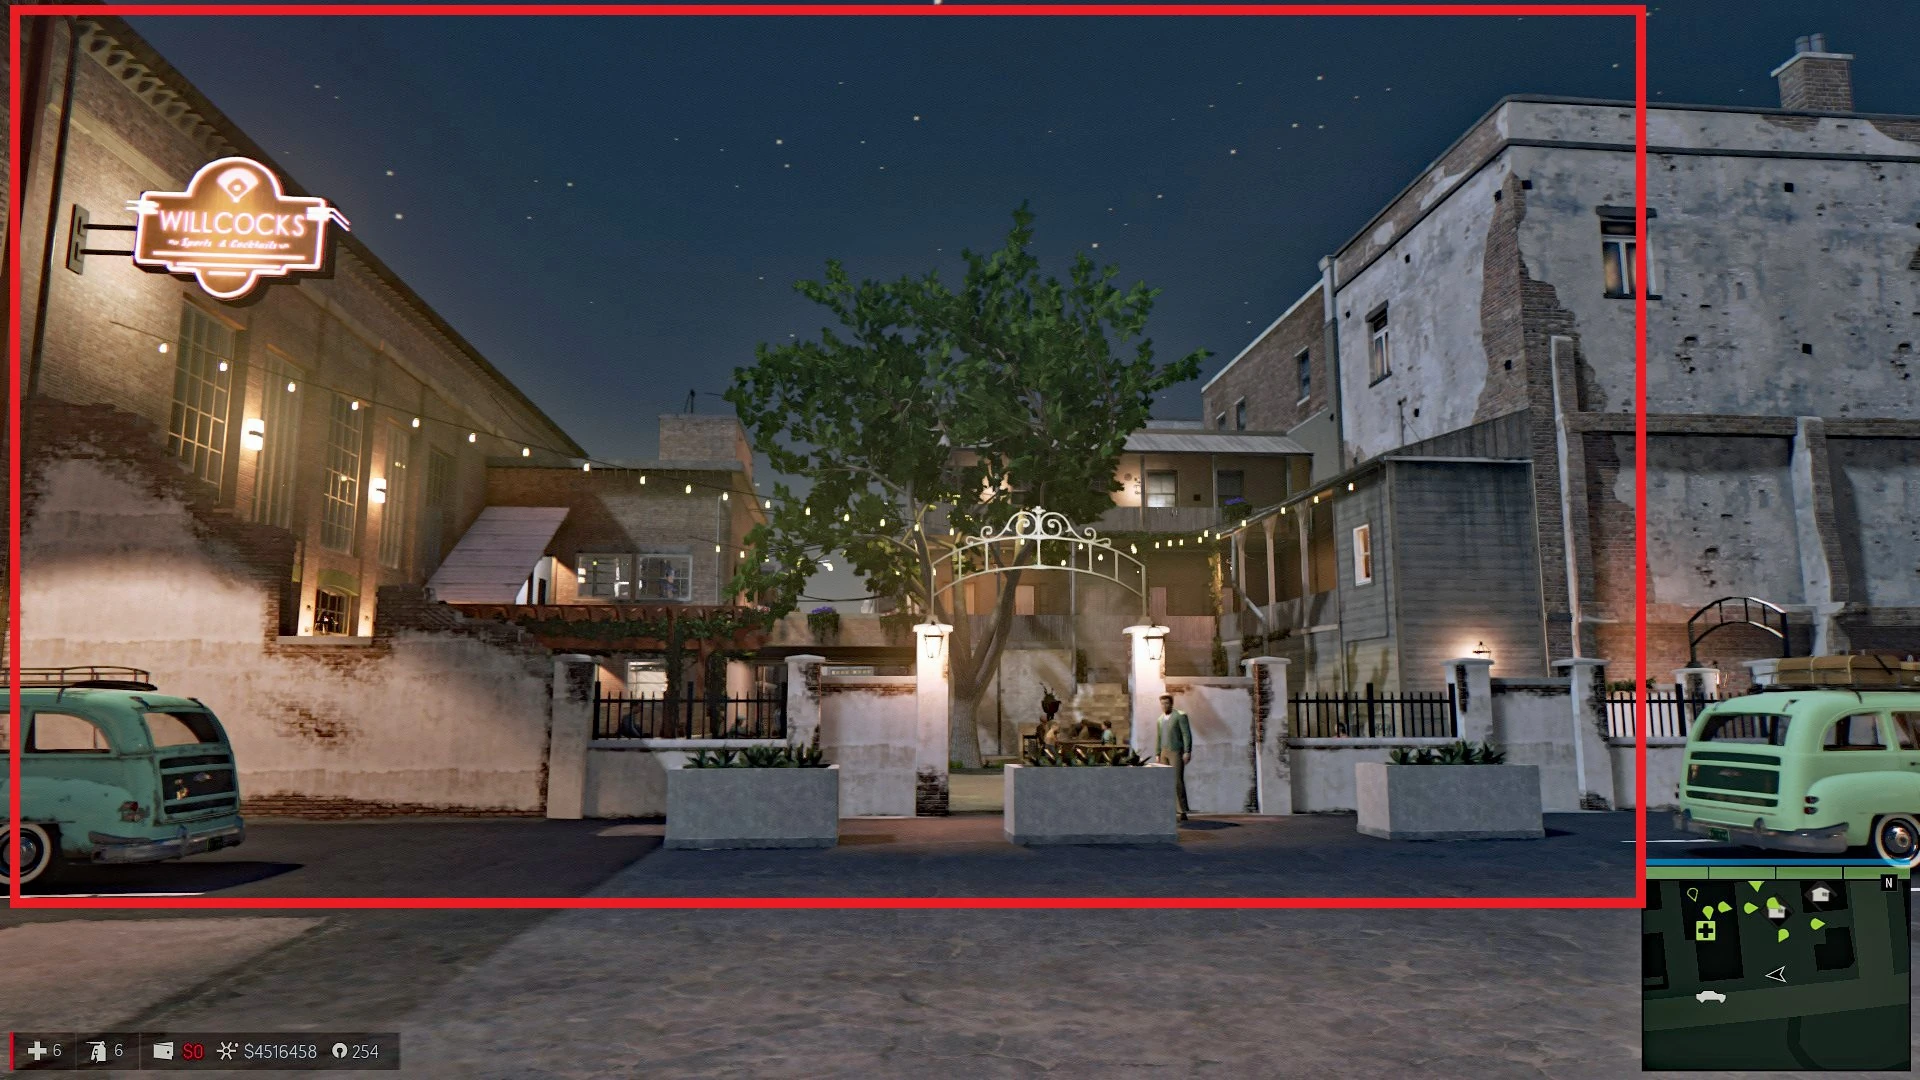
Positioned on subject
Once you're in cover or crouched by an object, turn your camera angle around and center the subject within the red rectangle shown in the example image, then take your screenshot. This is when taking cover by a tall object comes into play, if it's too short the camera will simply go back behind the player character.
Cropping Images


Final image
Once you've captured an image it likely needs to be cropped before you upload it to the wiki. Any image editing program may be used for this, if you don't have one on your computer there are also online sites that offer image editing as well. The subject of the image should be centered and all HUD elements should be removed. When cropping, use the option to retain the original image size of 1920 X 1080, if the software doesn't offer that option, you will need to resize it before uploading. Character images should use a portrait ratio, and other images may vary from the 1920 X 1080 size depending on the subject.
Uploading Images

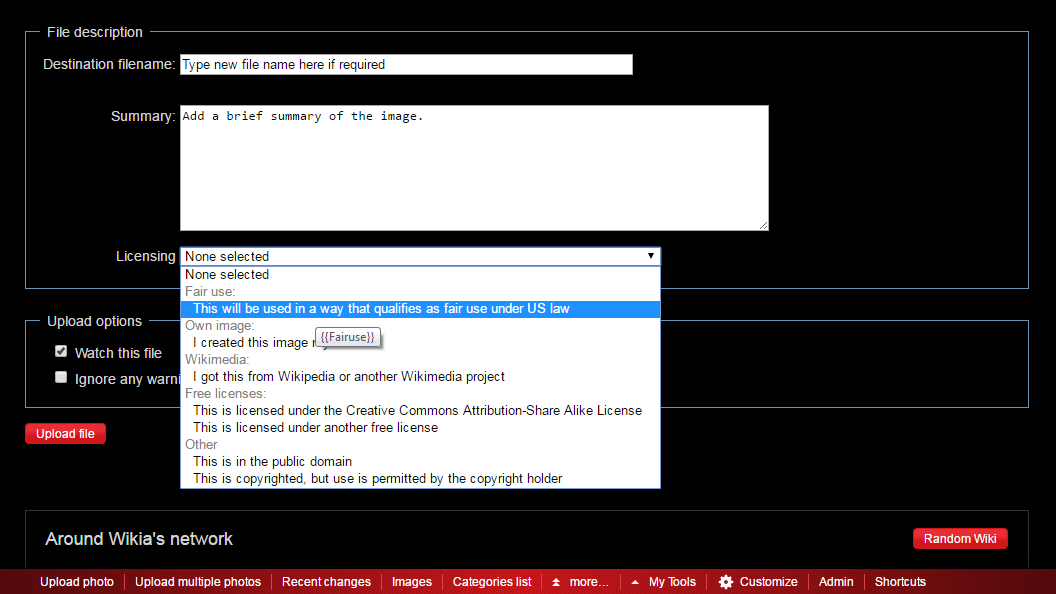
Using the file upload tool
Once your image is ready it's time to upload it here. The best way to upload an image is with the Single Upload or Multiple Upload tool. You can add these tools to your lower toolbar by clicking the customize button. When using the upload tool, you have inputs for the following.
- Destination file name: This allows you to give the file a new name. Under most circumstances images should be given the same name as the page they are being added to, followed by a corresponding number when applicable.
- Summary: This section is where you add the file description.
- Licensing: This is where you select the proper copyright license, for gameplay images it should be Fair Use.
Once you've completed the above, click the Upload File button and you're done. Remember to add the image to the proper category once it's uploaded, you can see a complete list of available image categories here: Category:Images
For a more comprehensive explanation of our image policy please see our Media Policies page.